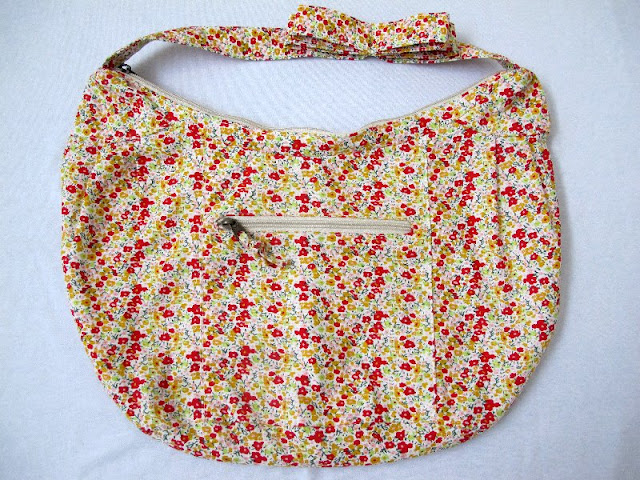
I got this bright, springy, flowery purse at Old Navy back in February.
I mostly bought it because of the fun and bright print full of pinks, yellows, and greens.
However, once I started wearing it around town, I started liking it less and less.
The strap was too long, and the purse was too flimsy.
It has a deceivingly huge amount of space inside, which I like, but it was just too floppy for me.
I hated to see such a cute purchase go to waste, so I decided to fix it up (just a little bit) to better fit my needs.
So here it is before, all long and floppy:
*Just a little disclaimer...there really is no rhyme or reason to anything I did to this purse. I was seriously making it up as I went. I'm almost positive that there are better, more professional ways to go about this. This was just a fun little project for me/myself, so take from it what you will!*
I started out by shortening the strap. I decided where I wanted it to be and sewed it together at that point.
I decided to make the leftover strap into a little bow so that I wouldn't have to mess with cutting and making sure edges were finished off, etc, etc.
I simply pinched the extra strap down where I wanted it and sewed that piece together. I did that twice to make a double layered bow. I then sewed through all the layers of the bow to hold it in place.
I still plan on wrapping a little ribbon or something around the center of the bow for a more "finished" look, I just haven't gotten around to that yet.
Next, I worked on making the bag part of the purse a little smaller.
This is where I was really just experimenting, and hoping that I didn't ruin the whole thing.
I flipped the purse over, so the front was facing down and pinched up around the edge.
This was the extra material that I wanted to take off.
I pinned around and then serged around this edge, cutting off any excess.
Can you see the pins?
This is what it looked like after serging.
Of course, I didn't want the outside of my purse to look like that, so there is just a little more work to be done.
I flipped the bag inside out.
Then, I sewed a straight stitch around the edge, leaving about a 1/4 " seam allowance.
I guess you could relate this to creating a "french seam."
Once you sew around the edge on the inside, the serged edge on the outside should be hidden inside the seam.
So, when you flip it right side out, it looks as good as new!
The purse doesn't look a whole lot different in these pictures, but it is definitely a good change from before.
I am just glad that it didn't end up all wonky and lop sided!
Now, it is the perfect sized shoulder bag.
It is smaller which keeps it from being so flimsy, yet still holds a remarkable amount of stuff!
I wore it around all weekend feeling very pleased with myself.
As far as I can remember, this is my first "clothing" refashion.
I think I could get in to this. I actually have a maxi dress sitting in my closet that I might just make into a skirt...you'll be the first to know if I do!


Wonderful refashion!
ReplyDelete